And now the layout

Having built my trams they have to run on something, and if you are going to  run trams then the carpet just will not do. I have to admit to having previously built a HO continental tram layout based on a layout which was at the 1994 Nuremberg toy fair, Hamannstadt. This layout had featured in the much missed Scale Model Trains magazine of May 1994 and I had extended and adapted the plan. Now I had less room and the old layout size of  2m x 1m in N gauge Trams would take forever to build.

I had a piece of the old tramway board which measured 1m x 50cm and this seemed to do the trick. I use chip board based on a 2″ x 1″ framework. I attached legs and I now had a board. The basic layout plan can be seen in fig 1

The next problem was to select track any railway track is never tight enough for a small tram layout and therefore all forms of railway track had to be avoided. Anyway trying to build my own tram track in N gauge seemed a step above and beyond the call of duty.

A visit to e bay revealed someone was selling Tomix track and the conversion set they sold to turn it into tram track a system it is a lot like the old Hartel system so seemed right for me and three bids later I had almost all the track I needed and enough of the conversion kits to make the system work. It was not cheap but it is good.

Tomix track however has certain problems, I have not yet found any tomix insulators and it is a pain to reduce in size. The first problem I over came by trial and error and eventually I found that Peco OO insulators and track joiners worked fine however you have to carefully remove the plastic underneath the track end. The latter problem remained and cutting track down to size was a problem which brute force and ignorance over came. The brute force being supplied by a minicraft saw and the ignorance by me.

I also found it helpful to wire the track before laying it. I must confess to having learnt my wiring skills from my grandfather who used to lecture for the old GPO and whilst it may be basic it does work. Therefore I had one common feed for the whole main oval and boke the other side of the rail into 20 different sections. This has the advantage of allowing multiple movement from one controller with out all this computer chip rubbish.

Tomix track is designed for a little purpose built track feed but I failed to track these down so I cut into the rail from below and soldered to the bottom of the track. It works well.

The over confusing  thing about tomix track is the point motors but I will leave that for another date.

A final piece of advice is that the track needs good track pins and i always find that the nice pins of peco are fine for some jobs there is nothing like the track pins produced by Hornby for size and holding power they really are the six inch nails of the modelling world.

I’ll save the rest till next time which for all of you regular readers I promise will not be a long time off. Bye for now

Posted in model trams, modelling, n gauge, trams, Typhoo Trams, Uncategorized | Tagged , , , , , , | Leave a comment

The Difficult Bit. The Motor

Fig 2
Fig(1) Kato chassis

I have had some comment that the problem is you can’t find the motor well they can be found either on Ebay or Wellington models in Somerset had some.

You need a Kato 103 motor unit (See Fig 1,) a good microcraft drill and grinder attachment,  a steady hand and either bravery or stupidity.I leave you to decide.   Having bought your motor, Sixteen pounds sterling or less, you need to wonder at the size and reliability of this little motor.Finally  check it works and then put it to one side. Whilst you work on the bottom of the Typhoo Tram.

The tram needs the area  where the wheels sat , between the two vestibules removing and then filing down till you have a wide hole.(See Fig 2). You will need to file away the supports on the lower sides so the motor will then fit in.

Having prepared the hole, you now need to file away large parts of the chassis. Start at each end and remove the couplings and the body work till you have the correct length.

The n turn to the width, and start above the wheel bearing as these will remain in place and work slowly on the sides until the motor resembles Fig 3. This motor should then slide into the bottom.

fig 3

The purest will say these were eight wheel bogie trams and you have made them 4 wheel. To which the answer is this is N gauge not O gauge and you cannot tell the difference the tram looks good.

Having fixed the motor do not glue it in it will hold firm, you need to glaze the windows and attend to the roof.

I have used a pantograph on mine Sommerfeldt make very good ones that are sprung in the UK you can buy them from Blackwell’s but they are £10 sterling each, a bow collector would work but I could not find one small enough a trolley pole could be made but unless it had a moving wheel it would never look right. If you want a life-size example look at a Sunderland tram they all had Pantographs.

Transfers were found in a box some where my late father hid them but Mabex transfers cut down work or else buy a Tower Model’s Tram  just for the transfers. Do not forget to apply Matt Varnish and thus you have a working Typhoo Tram.

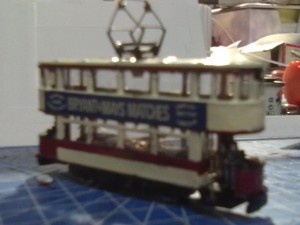
I thought that was the hard bit, my next blog will explain how the track was laid. In the meanwhile I leave a photo of the final model , happy modelling and do leave your comments they are welcome.!!

Finished Tram No19

Posted in model trams, modelling, n gauge, n guage, trams, Typhoo Trams | Tagged , , , , | Leave a comment

How to bring the tram back to life

In order to turn the model typhoo tram into a working machine several hours of hard work are needed.

The first task is to strip the tram of its paint. For this I suggest the use of Phoenix Precision PS18 Superstrip a metal tin and several wire brush tips for a minicraft model drill.

The results should be a shiny metal tram with most of the paint removed. If not succesful try again and eventually you will suceed.However do wear eye protection one tram can demolish several wire brushes and the bits get every where if you are not careful.

Having successfully stripped it back to bare metal you now need to remove the blocked in windows.Either totally or by simply removing the metal infill. On my first model I removed the upper windows and the blocked in side windows. This is done by using a small 0.06mm drill a slow speed on the minicraft drill. If you do not have the minicraft controller draw the 12v required through a model railway controller and eventually you end up with all the windows opened up. It is then necessary to remove the bottom of the tram between the two vestibules again this is done with a larger drill and then you need to saw off the wheel bogies.

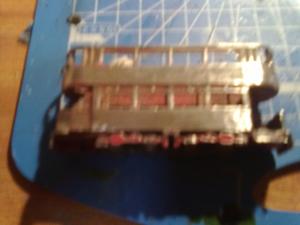
The picture shows the tram with the windows drilled out. In order to cut out the bits between the holes use the drill at a higher speed as if it were a knife.

Finally in order to make the motor bogie fit (see next Blog) you need to make the hole at the bottom of the tram as wide as you can. Care must be taken not to take the side of the tram out.

The change done to the motor, in this case a Kato Motor will be explained in the next blog.

When it came to painting the tram, the world is your oyster. I used  carmine and cream on the first tram.The roof is painted light grey and the bumpers and controls are matt black.

The next stage is to find transfers. Here I must confess to having an inherited collection of transfers, from all sorts of places but the transfers used here are cut down Mabex transfers plus the numbers from a keil kraft kit.

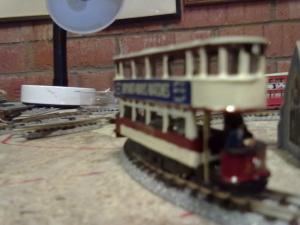
The pantograph is non working and comes from somerfeldt. The result as shown below is I think stunning.It also helps to add a driver and conductor. I also glazed the windows but that is not absolutely necessary. The final touch was to insert the poles in the entrance.This is done by drilling a hole in the step and insert a brass wire pin . The end result is that for an outlay of 50p plus the cost of the pantograph I have a much more life like tram.I hope you enjoy

Posted in modelling, n gauge, trams | Tagged , , , , | 2 Comments

Typhoo Trams the begining

Typhoo Trams were produced in the 1980’s they are a cheap version of an old matchbox tram which dates back to the early 1960’s. The model itself is a representation of an E1 type tram used by many of the tram companies in London before they were merged into London Transport in 1933. The type remained in use to the end of London trams in 1954.

These are N gauge models and I recently bought three of them at a car boot sale for 50p each. They looked so lifeless and sad trams are animate live things ladies of great beauty and these trams needed to come back to life.

So I have set myself the task of bringing them back to life this blog will be the story of how I progress in the next few weeks and will if technology allows include pictures of how  I have done too.

Please comment if this is of interest to you

Posted in modelling, n gauge, trams | Tagged , , | Leave a comment