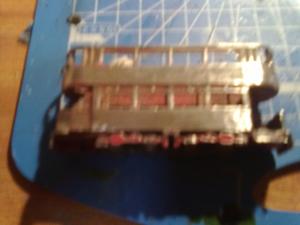
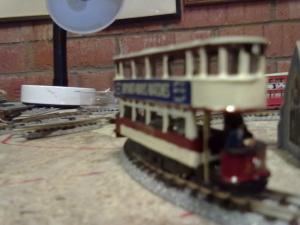
In order to turn the model typhoo tram into a working machine several hours of hard work are needed.
The first task is to strip the tram of its paint. For this I suggest the use of Phoenix Precision PS18 Superstrip a metal tin and several wire brush tips for a minicraft model drill.
The results should be a shiny metal tram with most of the paint removed. If not succesful try again and eventually you will suceed.However do wear eye protection one tram can demolish several wire brushes and the bits get every where if you are not careful.
Having successfully stripped it back to bare metal you now need to remove the blocked in windows.Either totally or by simply removing the metal infill. On my first model I removed the upper windows and the blocked in side windows. This is done by using a small 0.06mm drill a slow speed on the minicraft drill. If you do not have the minicraft controller draw the 12v required through a model railway controller and eventually you end up with all the windows opened up. It is then necessary to remove the bottom of the tram between the two vestibules again this is done with a larger drill and then you need to saw off the wheel bogies.
 The picture shows the tram with the windows drilled out. In order to cut out the bits between the holes use the drill at a higher speed as if it were a knife.
Finally in order to make the motor bogie fit (see next Blog) you need to make the hole at the bottom of the tram as wide as you can. Care must be taken not to take the side of the tram out.
The change done to the motor, in this case a Kato Motor will be explained in the next blog.
When it came to painting the tram, the world is your oyster. I used carmine and cream on the first tram.The roof is painted light grey and the bumpers and controls are matt black.
 The next stage is to find transfers. Here I must confess to having an inherited collection of transfers, from all sorts of places but the transfers used here are cut down Mabex transfers plus the numbers from a keil kraft kit.
The pantograph is non working and comes from somerfeldt. The result as shown below is I think stunning.It also helps to add a driver and conductor. I also glazed the windows but that is not absolutely necessary. The final touch was to insert the poles in the entrance.This is done by drilling a hole in the step and insert a brass wire pin . The end result is that for an outlay of 50p plus the cost of the pantograph I have a much more life like tram.I hope you enjoy


Great blog entry. I have a bunch of these that I have purchase but I haven’t had much luck motorizing any yet. I’d really like to read your advice on how to go about motorizing this model. Any advice?
See next blog for details of the motor